To add a window
-
Click the Add Window icon.
The Trace window tool settings appear.
- Select a Fabric type and enter values for Height and Sill height.
-
Activate the Fins option.
The fin assembly definitions drop-down list is activated. Fins constructions appearing on this list are created and managed using the Fin Manager.
-
Follow the prompts: Trace window > Select a room – Select a
wall in the room you want to add the window to with a data point.
You are now in trace mode. AccuDraw is activated.
-
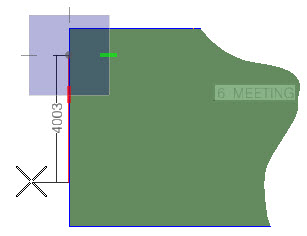
Trace window > Enter 1st point– Snap to one side of the window
opening on your floor plan, or if you don't have a floor plan to reference, use
AccuDraw to position the pointer relative to the room boundaries. Enter a data
point to define the start location of the window.
A dimension appears with one end attached to the first point and AccuDraw, and the other end attached to the pointer, updating the value as you move it.
-
Trace window > Enter 2nd point– Snap to the other side of the
window opening on your floor plan, or if you don't have a floor plan to
reference, use AccuDraw or the dimension display to position the pointer
accurately. Enter a data point to finish.
The window is created graphically and in the OpenBuildings Energy Simulator Project Tree.